

Measuring range
Calibration verification
Run low, middle and high materials to check calibration accuracy across the range you report. Enter the assigned values or target ranges with your results. LabRuns checks every replicate and material mean against your limits and shows whether the materials reach both ends of your claimed range.
Your first week is free, with no card needed. See pricing.
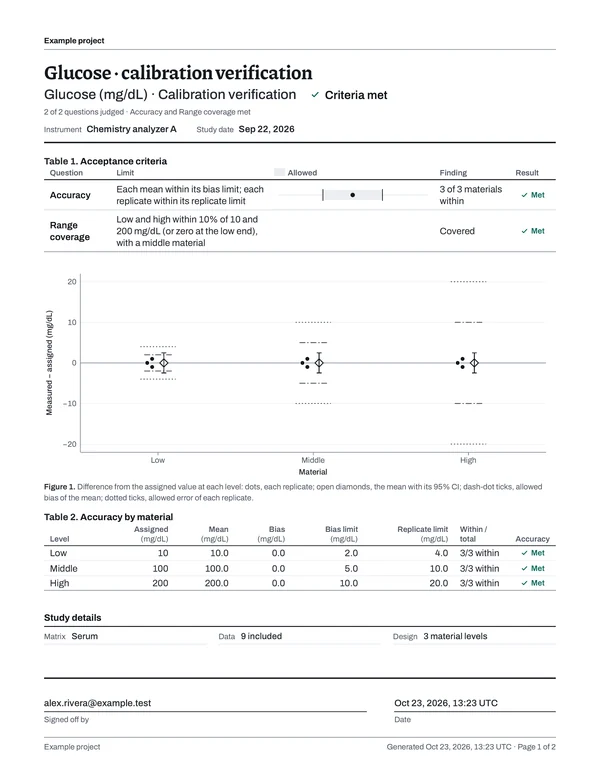
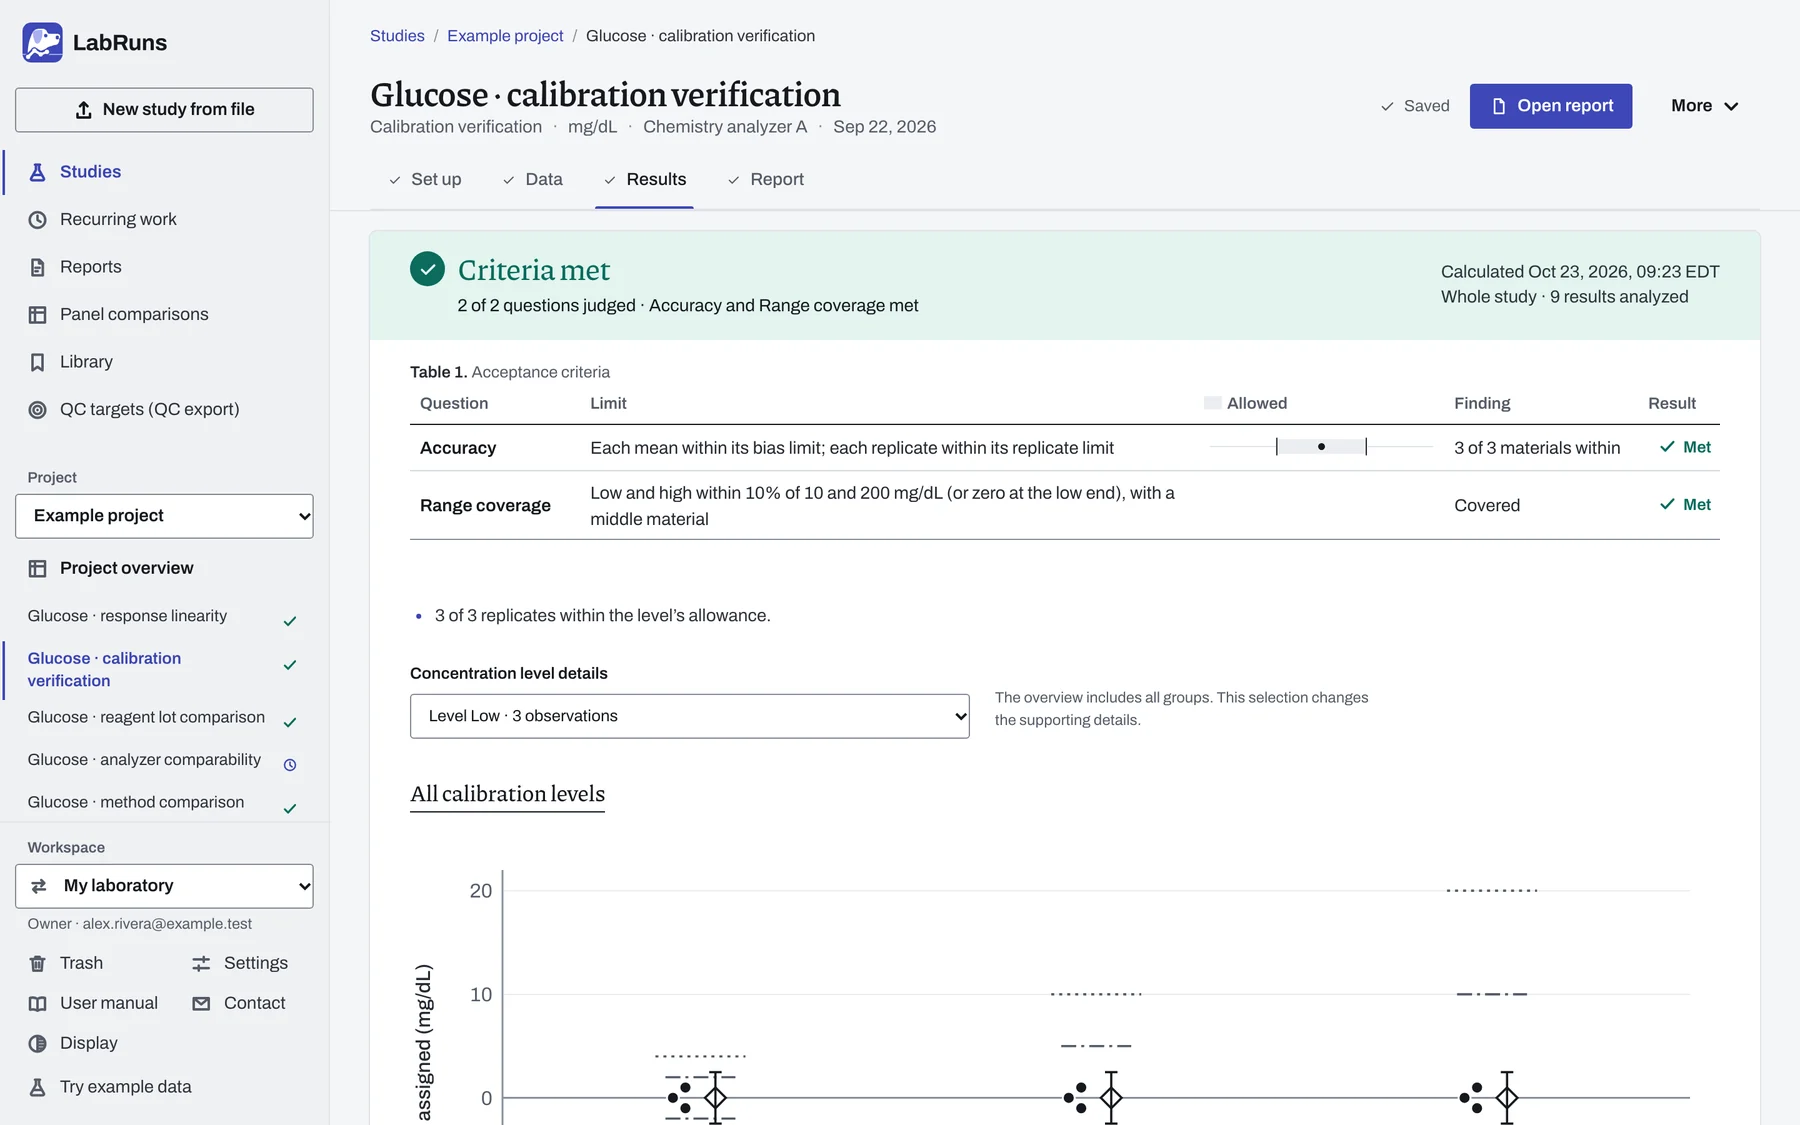
Every limit and its result on one screen.
Mean bias and every replicate are judged material by material against the allowances you set, and the level details below show the measurements behind each outcome.
Collection plan
- Suitable low, middle and high materials covering the claimed range, with independent assigned values or target ranges for this method and unit.
- The kit or material lot and preparation instructions. For dilution or admixture work, use independently assigned anchor concentrations.
- Enough material for three measurements at each level in one run on one day. Add levels around important decision concentrations or across a wider range.
Suggested starting design: 3 material levels × 1 day × 1 run × 3 replicates; 9 results.
The low, middle and high design follows the calibration-verification framework in 42 CFR 493.1255.
Acceptance limits
For materials with assigned concentrations, enter the total allowable error and the share of it allowed for mean bias; the optional precision index takes its own share. For materials with target ranges, enter each material's inclusive lower and upper bounds.
Then enter the low and high ends of your claimed range and how close the end materials must come to them. LabRuns checks that the low and high materials land in their endpoint windows and that the middle material sits between them. With independently assigned concentrations, you can add a separate linearity limit too.
Report
Page 1 gives Accuracy and Range coverage as two separate outcomes, with your limits and the result for each material. A replicate that misses its limit still shows, even when its material mean passes. Later pages list the material levels and every measurement.
Records
Each saved calculation keeps the data and limits it used. History lists every saved calculation and signed report, each with its own PDF. Prepare an evidence binder with the report versions you choose, grouped by analyte or analyzer, and download the combined PDF and supporting archive.
Keep the material assignments or target ranges, the lot and preparation records, the calibration and QC records for the day, and your endpoint criteria. Recurring work plans the scheduled and event-triggered checks and links each one to its finished study.
Guides
Read the bench guide before you collect, or follow an example study from setup to its signed report.
Run your next calibration verification.
Start from the suggested collection plan, bring in your analyzer results and sign the report once your laboratory has made its decision.